VPS侦探论坛

 找回密码
 注册
查看: 14578|回复: 1

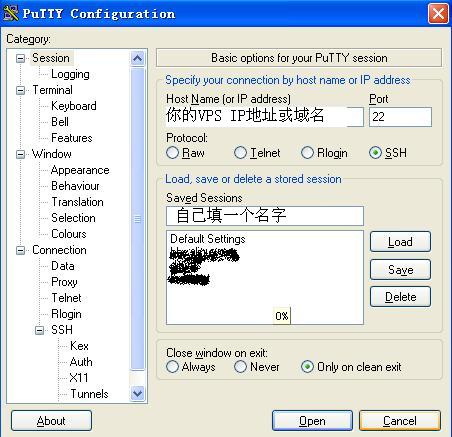
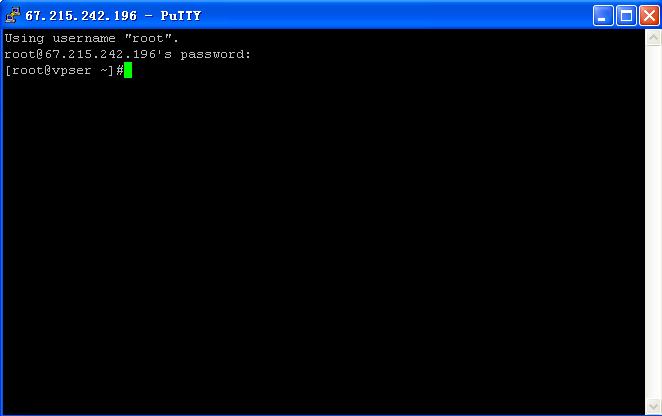
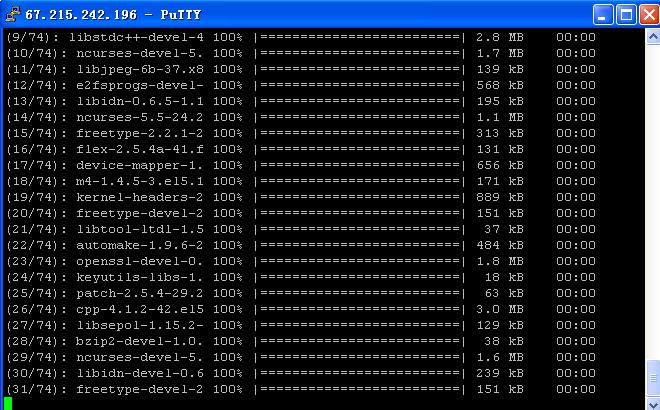
[Apache] VPS初始化及Nginx+MySQL+PHP/PHPMyAdmin安装优化

[复制链接]
发表于 2009-4-23 20:46:11 | 显示全部楼层 |阅读模式

VPS购买来了,不能就这么放在,对吧。下面给大家说一下VPS买来之后的初始化操作,及Nginx+MySQL+PHP+PHPMyAdmin+eAcelerator+vsftpd这些软件的编译安装。

一、登录VPS

登录的方式很多,如果是Linux直接ssh就可以。

下面以Windows下putty为例:


填写上IP或域名,再写个名字,save ,然后Open


二、安装LNMP(基于CentOS)

安装Nginx+MySQL+PHP+PHPMyAdmin+eAcelerator+vsftpd使用LicessLNMP

有些VPS默认是安装Apahche的,如果安装了,请先执行:yum -y remove httpd

下面是按照的过程使用的命令,及相关注释(注释用 //,红色加粗为所使用的命令),LNMP已更新,新版请到http://blog.licess.cn/lnmp/ 看新教程。

Using username “root”.
root@67.215.242.196’s password:
[root@vpser ~]#cd /usr/local/src
[root@vpser src]#ls
[root@vpser src]#wget http://licess.googlecode.com/files/LNMP.zip      //下载LNMP文件
–11:29:51–  http://licess.googlecode.com/files/LNMP.zip
Resolving licess.googlecode.com… 209.85.173.82
Connecting to licess.googlecode.com|209.85.173.82|:80… connected.
HTTP request sent, awaiting response… 200 OK
Length: 11261 (11K) [application/x-zip]
Saving to: `LNMP.zip’
100%[=======================================>] 11,261      –.-K/s   in 0.1s
11:29:52 (111 KB/s) – `LNMP.zip’ saved [11261/11261]
[root@vpser src]#unzip LNMP.zip        //解压LNMP压缩包
Archive:  LNMP.zip
   creating: LNMP/
   creating: LNMP/conf/
  inflating: LNMP/conf/fcgi.conf
  inflating: LNMP/conf/nginx-load.conf
  inflating: LNMP/conf/nginx-proxy.conf
  inflating: LNMP/conf/nginx.conf
  inflating: LNMP/conf/php-fpm.conf
  inflating: LNMP/down.sh
  inflating: LNMP/install.sh
  inflating: LNMP/opt.sh
  inflating: LNMP/readme.txt
  inflating: LNMP/startup.sh
[root@vpser src]#cd LNMP
[root@vpser LNMP]#ls
conf  down.sh  install.sh  opt.sh  readme.txt  startup.sh
[root@vpser LNMP]#chmod +x install.sh down.sh        //为install.sh和down.sh添加执行权限
[root@vpser LNMP]#./down.sh                                                   //下载安装所需的源代码文件
=========================================================================
LNMP v0.0.1 for VPS  Written by Licess
=========================================================================
For more information please visit http://blog.licess.cn/lnmp/
start download LNMP package
………………………….省略下载过程
download package finished!
=========================================================================
[root@vpser LNMP]#clear
[root@vpser LNMP]#ls
conf                          mysql-5.0.22.tar.gz
down.sh                       nginx-0.7.19.tar.gz
eaccelerator-0.9.5.3.tar.bz2  opt.sh
install.sh                    pcre-7.7.tar.gz
libiconv-1.12.tar.gz          php-5.2.6-fpm-0.5.9.diff.gz
libmcrypt-2.5.8.tar.gz        php-5.2.6.tar.gz
mcrypt-2.6.7.tar.gz           phpMyAdmin-3.1.1-all-languages.tar.gz
memcache-2.2.3.tgz            readme.txt
mhash-0.9.9.tar.gz            startup.sh
[root@vpser LNMP#]./install.sh        //开始安装
=========================================================================
LNMP v0.0.1 for VPS  Written by Licess
=========================================================================
A tool to auto-compile & install Nginx+MySQL+PHP on Linux
For more information please visit http://blog.licess.cn/lnmp/
The path of some dirs:
mysql dir:   /usr/local/mysql
php dir:     /usr/local/php
nginx dir:   /usr/local/nginx
web dir      /web/www
=========================================================================


在此步中输入你要绑定的域名,例如:diavps.vpser.net  ,回车确认。
Please input domain:
(Default domain: www.lnmp.org):diavps.vpser.net
===========================
domain=diavps.vpser.net
===========================
Press any key to start…                                     \\再次按任意键确认,开始安装
Loading “fastestmirror” plugin
………………………………..
开始安装……..

PS:屏幕疯狂的滚动…….欣赏一下

经过漫长的等待(时间不确定,根据实际情况,我的是半个多小时),终于安装完了。

下面看一下PHPInfo

PHPMyAdmin:


程序安装路径:

MySQL :   /usr/local/mysql
PHP :     /usr/local/php
Nginx :   /usr/local/nginx
PHPMyAdmin /web/www/phpmyadmin
Web目录    /web/www
MySQL  用户:root  密码:root

通过下面这几个链接查看phpinfo和管理MySQL
phpinfo    http://ip/phpinfo.php
phpMyAdmin http://ip/phpmyadmin

让Nginx开机后手动执行 /root/run.sh 后Nginx会运行 ,开机自动运行可以运行 LNMP目录下面的 startup.sh 文件即可。
opt.sh 为优化文件,如果内存小于128MB可以通过执行 ./opt.sh 添加swap分区,并修改时区为东8区。注:并不一定在所有的VPS上都可以添加swap分区,swvps不可以,其他没有测试。

安装完后,请立即修改您的MySQL的root密码,使用命令cd /usr/local/mysql/bin
再执行:./mysqladmin -u root -p password mypasswd          //mypasswd为自己的密码
输入这个命令后,需要输入root的原密码,然后root的密码将改为mypasswd。
把命令里的root改为你的用户名,你就可以改你自己的密码了。

进入phpmyadmin目录/web/www/phpmyadmin  将 config.default.php 修改为config.inc.php
修改这个文件的 $cfg['Servers'][$i]['auth_type'] = ‘http’;
                                $cfg['blowfish_secret'] = ‘VPSER’;    //VPSER为任意字符
保存,然后就可以登录了。
安装vsftp:
下载vsftpd-for-LNMP.zip:执行 wget http://blog.licess.cn/uploads/200903/vsftpd-for-LNMP.zip
unzip vsftpd-for-LNMP.zip
cd vsftpd for LNMP
./installvsftpd.sh

安装完毕后即可使用你的SSH的帐号和密码登录,也可以修改/etc/vsftpd.chroot限制用户在家目录里。默认添加了adminftp用户,但是没有设置密码,可以执行passwd adminftp 来设置密码,或者userdel admintpd 删除用户。
执行 adduser -d /web/www/user1 -s /sbin/nologin user1  来添加一个不能SSH登录的FTP帐号,家目录为/web/www/user1 但是没有限制,添加限制,请修改/etc/vsftpd.chroot 添加要限制的用户。

更详细的关于LNMP的可以看:http://blog.licess.cn/lnmp/
可能在安装过程中遇到什么问题可以在下面留言。

转载请注明出处:VPS侦探 http://www.VPSer.Net
美国VPS推荐: 遨游主机LinodeLOCVPS主机云搬瓦工80VPSVultr美国VPS主机中国VPS推荐: 阿里云腾讯云。LNMP付费服务(代装/问题排查)QQ 503228080
发表于 2009-7-18 17:06:02 | 显示全部楼层


我使用独立服务器 系统用了CentOS 5.3版本的
前面几步运行正常,到了编译系统的时候就出问题了。
打开/usr/local/nginx 或者是其他几个目录里面全部是空的~
Linux下Nginx+MySQL+PHP自动安装工具:https://lnmp.org
您需要登录后才可以回帖 登录 | 注册

本版积分规则

小黑屋|手机版|Archiver|VPS侦探 ( 鲁ICP备16040043号-1 )

GMT+8, 2024-5-6 14:53 , Processed in 0.026557 second(s), 16 queries .

Powered by Discuz! X3.4

© 2001-2023 Discuz! Team.

快速回复 返回顶部 返回列表